您是否曾经为项目构建过高级滑块?如果是这样,您可能已经利用了许多 javascript 轮播中的任何一个。过去,我介绍过其中两个:slick和Owl。今天给大家介绍另一个比较有名的:Swiper。

我们的滑块项目
检查我们将要构建的内容:
See the Pen How to Build a Responsive Slider With Swiper.js by Envato Tuts+ (@tutsplus) on CodePen.
请务必在大屏幕上打开演示并调整窗口大小以查看页面布局的变化。
什么是滑动滑块?
Swiper是由Vladimir Kharlampidi创建的免费 JavaScript 插件,可让您创建现代的响应式滑块。
在撰写本文时,它拥有近 30,000 个 GitHub 星,它被认为是目前最占主导地位的 javaScript 插件之一。为了更好地了解它的功能,请查看可用的演示。
Swiper 不仅可用于纯 JavaScript。如果您计划使用流行的 JavaScript 框架(例如 react)构建应用程序并需要滑块,请考虑查看相关的内置 Swiper 组件。
开始使用 Swiper
要开始使用 Swiper,请首先在您的项目中下载并安装以下文件:
swiper-bundle.css或其缩小版
swiper-bundle.js或其缩小版
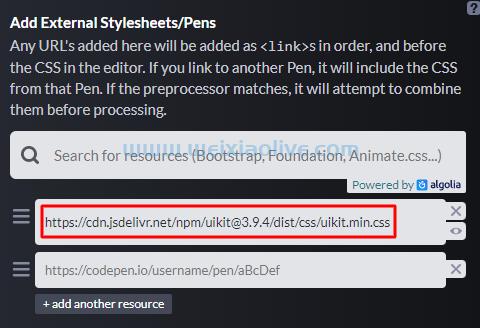
您可以通过访问GitHub存储库、使用包管理器(例如npm )或通过 CDN 加载必要的资产(例如cdnjs )来获取这些 Swiper 文件的副本。对于本教程,我将选择最后一个选项。
对于本教程,除了 Swiper 文件之外,我还合并了 Bootstrap 5 的 CSS 文件。
考虑到这一点,如果您查看我们演示笔的“设置”选项卡,您会看到有两个外部 CSS 文件和一个外部 JavaScript 文件。


1.确定布局
首先,让我们先确定项目范围。
今天的演示是一个专门介绍坦桑尼亚的网页,这是一个美丽无比的***。要设置页面,我们将从Wikipedia中获取一些内容和Unsplash中的图像。
让我们确定页面布局将如何出现在各种屏幕上。
移动布局
在小屏幕(<768px)上,它的外观会是这样的:

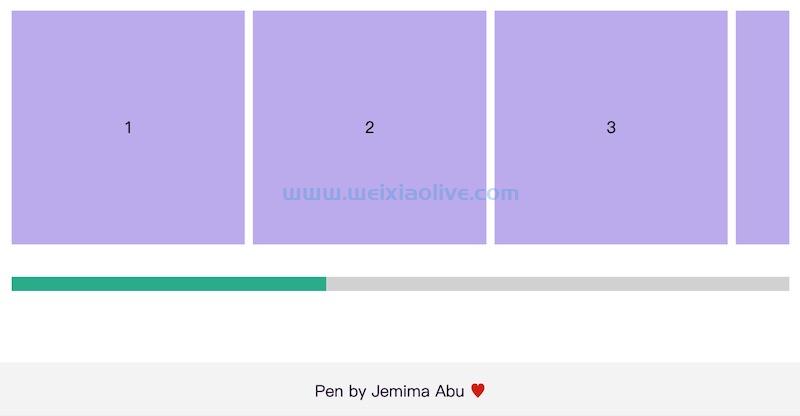
请注意,每个滑块显示第一张幻灯片和第二张幻灯片的一半。
平板电脑布局
接下来,在中等屏幕(≥768px)上,它的外观会发生如下变化:

请注意,第一个滑块显示前两张幻灯片和第三张幻灯片的一半,而第二个滑块仍显示两张幻灯片。
桌面布局
最后,在大屏幕(≥1200px)上,它会有这样的外观:

同样,考虑第一个滑块显示前三张幻灯片和第四张幻灯片的一半,而第二个滑块显示前两张幻灯片和第三张幻灯片的一半。
另外,请注意另一件事:第一个滑块的右侧与容器宽度对齐,正如我们将看到的那样,它将是 1100 像素。同理,第二个滑块的左滑块与容器宽度对齐。
红色区域表示随着视口越来越大而增加的空白空间。
2. 定义 html 标记
我们页面的标记将由四个部分组成:
第一部分和第三部分将包含取自维基百科的有关坦桑尼亚的信息。
第二和第四部分将包括两个相等的旋转木马,它们将通过 Unsplash 照片展示坦桑尼亚。这些部分将只有一个不同的类来确定它们的布局。也就是说,第二部分将有section-with-right-offset课程,而第四部分将有课程section-with-left-offset。
这是页面结构:
<section class="mt-5"> <div class="container">...</div> </section>
<section class="section-with-carousel section-with-right-offset position-relative mt-5"> <div class="container"> <h2 class="mb-3">...</h2> </div> <div class="carousel-wrapper"> <div class="swiper"> <div class="swiper-wrapper"> <div class="swiper-slide"> <figure> <img width="640" height="480" src="tanzania1.jpg" alt=""> <figcaption> <svg xmlns="https://www.w3.org/2000/svg" viewBox="0 0 24 24" width="20" height="20"> <path d="M12 13.5a2.5 2.5 0 100-5 2.5 2.5 0 000 5z"></path> <path fill-rule="evenodd" d="M19.071 3.429C15.166-.476 8.834-.476 4.93 3.429c-3.905 3.905-3.905 10.237 0 14.142l.028.028 5.375 5.375a2.359 2.359 0 003.336 0l5.403-5.403c3.905-3.905 3.905-10.237 0-14.142zM5.99 4.489A8.5 8.5 0 0118.01 16.51l-5.403 5.404a.859.859 0 01-1.214 0l-5.378-5.378-.002-.002-.023-.024a8.5 8.5 0 010-12.02z"></path> </svg> Nungwi, Zanzibar, Tanzania </figcaption> </figure> </div> <!-- more slides here --> </div> </div> </div> <div class="carousel-controls"> <button class="carousel-control carousel-control-left" type="button"> <svg xmlns="http://www.w3.org/2000/svg" viewBox="0 0 24 24" width="40" height="40"> <path fill-rule="evenodd" d="M10.78 19.03a.75.75 0 01-1.06 0l-6.25-6.25a.75.75 0 010-1.06l6.25-6.25a.75.75 0 111.06 1.06L5.81 11.5h14.44a.75.75 0 010 1.5H5.81l4.97 4.97a.75.75 0 010 1.06z"></path> </svg> </button> <button class="carousel-control carousel-control-right" type="button"> <svg xmlns="http://www.w3.org/2000/svg" viewBox="0 0 24 24" width="40" height="40"> <path fill-rule="evenodd" d="M13.22 19.03a.75.75 0 001.06 0l6.25-6.25a.75.75 0 000-1.06l-6.25-6.25a.75.75 0 10-1.06 1.06l4.97 4.97H3.75a.75.75 0 000 1.5h14.44l-4.97 4.97a.75.75 0 000 1.06z"></path> </svg> </button> </div> <div class="swiper-pagination"></div> </section>
<section class="mt-5"> <div class="container">...</div> </section>
<section class="section-with-carousel section-with-left-offset position-relative mt-5"> <!-- content same as second section --> </section> |
3.指定主要样式
现在让我们专注于页面中最重要的样式。
以下是值得注意的事情:
容器的最大宽度为 1100 像素。
Unsplash 图像的初始尺寸不相等。考虑到这一点,轮播图像将具有一个固定的高度,该高度会随着屏幕尺寸的不同而变化。在这里,我们将使用object-fit: cover属性值来拟合容器中的图像。或者,我们可以将图像添加为背景图像。
默认情况下,除了活动幻灯片的标题之外,所有图像标题都将被隐藏。随着活动幻灯片的变化,相关的标题将与小幻灯片动画一起出现。
以下是相关的样式:
.container { max-width: 1100px; }
.section-with-carousel .swiper-slide figure { position: relative; overflow: hidden; }
.section-with-carousel .swiper-slide img { width: 100%; height: 320px; object-fit: cover; }
.section-with-carousel .swiper-slide figcaption { position: absolute; bottom: 0; left: 0; right: 0; transform: translateY(20%); display: flex; align-items: baseline; justify-content: center; padding: 20px; text-align: center; opacity: 0; visibility: hidden; color: white; background: rgba(0, 0, 0, 0.5); transition: all 0.4s; }
.section-with-carousel .swiper-slide figcaption svg { flex-shrink: 0; fill: white; margin-right: 10px; }
.section-with-carousel .swiper-slide-active figcaption { opacity: 1; visibility: visible; transform: none; }
.section-with-carousel .carousel-controls { position: absolute; top: 50%; left: 0; right: 0; transform: translateY(-50%); display: flex; justify-content: space-between; padding: 0 12px; z-index: 1; }
.section-with-carousel .carousel-controls .carousel-control { opacity: 0.25; transition: opacity 0.3s; }
.section-with-carousel .carousel-controls .carousel-control:hover { opacity: 1; }
@media (min-width: 768px) { .section-with-carousel .swiper-slide img { height: 370px; } }
@media (min-width: 1200px) { .section-with-carousel .swiper-slide img { height: 420px; }
.section-with-carousel .carousel-controls { padding: 0 50px; } } |
自定义点导航
点导航的初始外观是这样的:

为什么不让它更具信息性和吸引力?为此,我们将在插件初始化期间添加一些样式并更新其默认标记。
这是更新的导航:

所需样式:
.section-with-carousel .swiper-pagination-bullets { position: static; display: flex; justify-content: center; margin-top: 10px; }
.section-with-carousel .swiper-pagination-bullets .swiper-pagination-bullet { display: flex; flex-direction: column; align-items: center; justify-content: center; width: auto; height: auto; background: transparent; opacity: 0.5; margin: 0 8px; border-radius: 0; transition: opacity 0.3s; }
.section-with-carousel .swiper-pagination-bullets .swiper-pagination-bullet .line { width: 3px; height: 3px; background: black; transition: transform 0.3s; }
.section-with-carousel .swiper-pagination-bullets .swiper-pagination-bullet .number { opacity: 0; transform: translateY(-7px); transition: all 0.3s; }
.section-with-carousel .swiper-pagination-bullets .swiper-pagination-bullet.swiper-pagination-bullet-active { opacity: 1; }
.section-with-carousel .swiper-pagination-bullets .swiper-pagination-bullet.swiper-pagination-bullet-active .line { transform: scaleX(8); }
.section-with-carousel .swiper-pagination-bullets .swiper-pagination-bullet.swiper-pagination-bullet-active .number { opacity: 1; transform: none; } |
请务必单击一个点以查看发生的小幻灯片动画。
4.添加JavaScript
至此,我们已经准备好将注意力转向 JavaScript。
偏移轮播部分
从之前的可视化中可以看出,轮播部分将在最大 1199 像素宽的屏幕上全屏显示。在较大的屏幕上,它们的左侧或右侧将停止全屏并与容器宽度对齐。如前所述,此行为将由section-with-left-offset和section-with-right-offset类确定。这样,我们将能够生成独特的布局,而不仅限于遵循网格系统的部分。

下面是实现此功能的 JavaScript 代码:
01 02 03 04 05 06 07 08 09 10 11 12 13 14 15 16 17 18 19 20 21 22 23 24 25 26 27 28 29 30 31 | createOffsets(); window.addeventListener("resize", createOffsets);
function createOffsets() { const sectionWithLeftOffset = document.queryselector( ".section-with-left-offset" ); const sectionWithLeftOffsetCarouselWrapper = sectionWithLeftOffset.querySelector( ".carousel-wrapper" ); const sectionWithRightOffset = document.querySelector( ".section-with-right-offset" ); const sectionWithRightOffsetCarouselWrapper = sectionWithRightOffset.querySelector( ".carousel-wrapper" ); const offset = (window.innerWidth - 1100) / 2; const mqLarge = window.matchMedia("(min-width: 1200px)");
if (sectionWithLeftOffset && mqLarge.matches) { sectionWithLeftOffsetCarouselWrapper.style.marginLeft = offset + "px"; } else { sectionWithLeftOffsetCarouselWrapper.style.marginLeft = 0; }
if (sectionWithRightOffset && mqLarge.matches) { sectionWithRightOffsetCarouselWrapper.style.marginRight = offset + "px"; } else { sectionWithRightOffsetCarouselWrapper.style.marginRight = 0; } } |
初始化 Swiper
这是初始化 Swiper 所需的最后一步。在这里,我们将所有自定义设置作为配置对象的一部分传递。查看下面的相关代码片段:
01 02 03 04 05 06 07 08 09 10 11 12 13 14 15 16 17 18 19 20 21 22 23 24 25 26 27 28 29 30 31 32 33 34 35 36 37 38 39 40 41 42 | const sectionsWithCarousel = document.querySelectorAll( ".section-with-carousel" );
for (const section of sectionsWithCarousel) { let slidesPerView = [1.5, 2.5, 3.5]; if (section.classList.contains("section-with-left-offset")) { slidesPerView = [1.5, 1.5, 2.5]; } const swiper = section.querySelector(".swiper"); new Swiper(swiper, { slidesPerView: slidesPerView[0], spaceBetween: 15, loop: true, lazyLoading: true, keyboard: { enabled: true }, navigation: { prevEl: section.querySelector(".carousel-control-left"), nextEl: section.querySelector(".carousel-control-right") }, pagination: { el: section.querySelector(".swiper-pagination"), clickable: true, renderBullet: function (index, className) { return `<div class=${className}> <span class="number">${index + 1}</span> <span class="line"></span> </div>`; } }, breakpoints: { 768: { slidesPerView: slidesPerView[1] }, 1200: { slidesPerView: slidesPerView[2] } } }); } |
如您所见,我们将根据视口宽度应显示的幻灯片数量传入一个数组。通过使用整数和小数,我们将能够只显示幻灯片的一部分。
即使没有必要,确定可见幻灯片数量何时更改的断点值也将匹配 Bootstrap 的断点。无论如何,请务必阅读api 文档以更好地了解所有这些配置参数的作用。
结论
我们完成了,伙计们!在本教程中,我们只用几行 JavaScript 代码和 Swiper.js 的强大功能创建了一个非对称页面布局。
我们只介绍了这个插件的基础知识。您可以轻松构建许多更高级的滑块。只需从Dribbble 之类的资源中获取一些灵感并练习自己!这是最好的学习方式!
- 移动布局
- 平板电脑布局
- 桌面布局
- 自定义点导航
- 偏移轮播部分
- 初始化 Swiper




![如何删除Word中的空白页[4种简单方法] 如何删除Word中的空白页[4种简单方法]](https://www.weixiaolive.com/en/zb_users/upload/2023/07/20230702124855168827333590644.png)

