在本教程系列的前一部分中,您学习了如何创建添加帖子组件来添加新的博客帖子。您学习了如何创建 rest api端点以将新帖子添加到mongodb数据库。
在本教程系列的这一部分中,您将学习如何实现从博客文章列表中编辑现有博客文章的功能。
入门
让我们从克隆教程系列最后一部分的源代码开始。
git clone https://github.com/royagasthyan/angularBlogApp-post EditPost
导航到项目目录并安装所需的依赖项。
cd EditPost/client
npm install
cd  EditPost/server
npm install
cd EditPost/client
npm start
cd  EditPost/servernode app.js
将您的浏览器指向 http://localhost:4200 ,您将运行该应用程序。
添加编辑帖子视图
在 中ShowPostComponent,您将添加两个用于编辑和删除博客文章的图标。您将使用font Awesome来显示编辑和删除图标。
下载并在文件夹中包含 font awesome 文件assets夹。
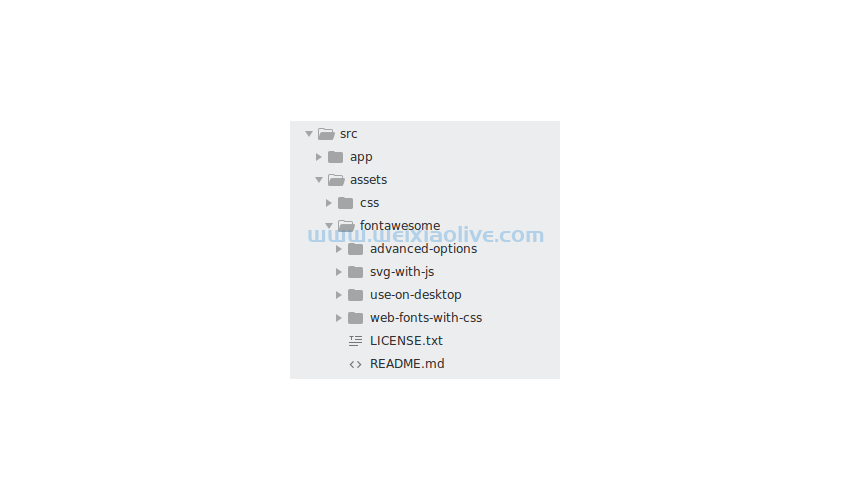
在src/app/index.html页面中,包含对 font awesomecss样式的引用。
<link rel="stylesheet" type="text/css" href="./assets/fontawesome/web-fonts-with-css/css/fontawesome-all.min.css">
现在修改show-post/show-post.component.html文件以包含编辑和删除图标的 HTML。
<div>
    <i title="Edit" class="fas fa-edit" aria-hidden="true"></i>
    <i title="Delete" class="fas fa-trash-alt" aria-hidden="true"></i></div>
这是 show-post.component.html文件的外观:
<div class="list-group">

        <a *ngFor="let post of posts" class="list-group-item list-group-item-action flex-column align-items-start">
            <div class="d-flex w-100 justify-content-between">
                <h5 class="mb-1">{{post.title}}</h5>
                <small>3 days ago</small>
            </div>
            <p class="mb-1">{{post.description}}</p>


           <div class="d-flex w-100 justify-content-between">
            <small>read more...</small>

            <div>
                <i title="Edit" class="fas fa-edit" aria-hidden="true"></i>
                <i title="Delete" class="fas fa-trash-alt" aria-hidden="true"></i>
            </div>

           </div>
        </a>

</div>保存上述更改并重新启动客户端应用程序。登录应用程序,您将能够查看与每个列出的博客文章对应的编辑和删除图标。

在弹出窗口中填充编辑详细信息
当用户点击任何博客文章对应的编辑图标时,您需要在添加文章弹出窗口中填充博客文章详细信息以进行更新。
为编辑图标添加点击方法。
<i title="Edit" class="fas fa-edit" (click)="editPost(post)" aria-hidden="true"></i>
在 内部CommonService,您需要定义一个 observable 来跟踪单击编辑按钮的时间。如图所示定义可观察对象:
public postEdit_Observable = new Subject();
定义另一个变量来跟踪要编辑的帖子。
public post_to_be_edited;

constructor(){
	this.post_to_be_edited = new Post();
}
每当单击编辑按钮时,您都会将要编辑的帖子保留在 中,CommonService并触发 observable 以通知帖子编辑。定义两种方法来设置要编辑的帖子和通知帖子编辑。
notifyPostEdit(){
	this.postEdit_Observable.next();
}

setPostToEdit(post: Post){
	this.post_to_be_edited = post;
	this.notifyPostEdit();
}
在 click 方法中,您setPostToEdit将从CommonService. 以下是该editPost方法的外观:
editPost(post: Post){
    this.commonService.setPostToEdit(post);
}当用户单击编辑按钮时,您将在公共服务中获得帖子详细信息。要显示添加帖子弹出窗口以进行更新,您需要按程序单击添加帖子按钮。
在home/home.component.html文件中,将#标识符添加到添加帖子按钮。
<button #addPost type="button" class="btn btn-link" data-toggle="modal" data-target="#exampleModal">
  Add
</button>
导入ViewChild和ElementRef里面的 home.component.ts文件。
import { Component, ViewChild, ElementRef } from '@angular/core';定义对文件内添加按钮的引用 home.component.ts。
@ViewChild('addPost') addBtn: ElementRef;在HomeComponent构造函数内部,订阅 postEdit_Observablefrom CommonService。在调用 postEdit_Observable订阅回调时,调用添加按钮单击以显示弹出窗口。这是home.component.ts文件的外观:
import { Component, ViewChild, ElementRef } from '@angular/core';
import { CommonService } from '../service/common.service';

@Component({
  selector: 'app-home',
  templateUrl: './home.component.html',
  styleUrls: ['./home.component.css']
})
export class HomeComponent {

    @ViewChild('addPost') addBtn: ElementRef;

	constructor(private commonService: CommonService){

		this.commonService.postEdit_Observable.subscribe(res => {
			this.addBtn.nativeElement.click();
		});

	}

}
您需要 postEdit_Observable在文件中订阅以设置要在变量add-post.component.ts上编辑的帖子。post以下是该ngOnInit方法的add-post.component.ts外观:
ngOnInit(){
    this.commonService.postEdit_Observable.subscribe(res => {
      this.post = this.commonService.post_to_be_edited;
    });
}保存上述更改并重新启动客户端服务器。登录应用程序并单击任何博客文章的编辑按钮。您将能够查看添加帖子弹出窗口中填充的帖子详细信息。

创建更新发布 REST API
在里面server/app.js,让我们定义另一个 REST API 端点来根据帖子的 ID 更新帖子的详细信息。这是它的外观:
app.post('/api/post/updatePost', (req, res) => {
})让我们首先使用mongoose连接到 MongoDB 数据库。
app.post('/api/post/updatePost', (req, res) => {
    mongoose.connect(url, { useMongoClient: true }, function(err){
		console.log('connection established');
	});
})建立连接后,您可以使用updatePost 模型上的方法。
Post.update(
	{_id: req.body.id },
	{ title : req.body.title, description: req.body.description },
	(err, doc) => {
	if(err) throw err;
})您将根据ID传递的帖子更新帖子。如上面的代码所示,您已指定_id要更新的帖子。在第二个选项中,您已指定要更新的字段,即title和description。
详细信息更新后,您将返回status更新期间受影响的行数。以下是发布更新的 REST API 端点的外观:
app.post('/api/post/updatePost', (req, res) => {
    mongoose.connect(url, { useMongoClient: true }, function(err){
		if(err) throw err;
		Post.update(
			{_id: req.body.id },
			{ title : req.body.title, description: req.body.description },
			(err, doc) => {
			if(err) throw err;
			return res.status(200).json({
				status: 'success',
				data: doc
			})
		})
	});
})
调用 REST API 进行更新
从 MongoDB中ID返回的每个帖子都是_id,因此您需要修改id我们的模型src/app/models/post.model.ts。这是它的外观:
export class Post {
    constructor(){
		this._id = '';
		this.title = '';
		this.description = '';
	}
	public _id;
	public title;
	public description;
}当您单击添加帖子按钮时,调用的方法将是addPost. 在 中的 addPost方法中add-post.component.ts,您将检查post对象是否具有 _id. 如果 an_id存在,那么您需要从服务中调用 update 方法,否则您将调用 add post 服务方法。
创建一个在文件updatePost内部调用的方法 。add-post.service.ts
updatePost(post: Post){
	return this.http.post('/api/post/updatePost',{
		id: post._id,
		title : post.title,
		description : post.description
	})
}以下是文件中修改后addPost的方法的 add-post.component.ts外观:
addPost() {
    if(this.post.title && this.post.description){
        if(this.post._id){
          this.addPostService.updatePost(this.post).subscribe(res =>{
            this.closeBtn.nativeElement.click();
            this.commonService.notifyPostAddition();
          });
        } else {
          this.addPostService.addPost(this.post).subscribe(res =>{
            this.closeBtn.nativeElement.click();
            this.commonService.notifyPostAddition();
          });
        }
	} else {
		alert('Title and Description required');
	}
}
保存上述更改并重新启动 Angular 和 Node 服务器。登录应用程序并尝试编辑帖子。单击编辑按钮时,您将显示一个弹出窗口以编辑详细信息。单击添加按钮,详细信息将更新并显示在博客文章列表中。
概括
在本教程中,您实现了更新现有博客文章详细信息的功能。您创建了后端 REST API 端点以根据博客文章 ID 更新博客文章详细信息。您使用Mongoose客户端更新了 MongoDB 数据库中博客文章的详细信息。
在下一部分中,您将实现删除帖子和注销功能。




![如何删除Word中的空白页[4种简单方法] 如何删除Word中的空白页[4种简单方法]](https://www.weixiaolive.com/en/zb_users/upload/2023/07/20230702124855168827333590644.png)

