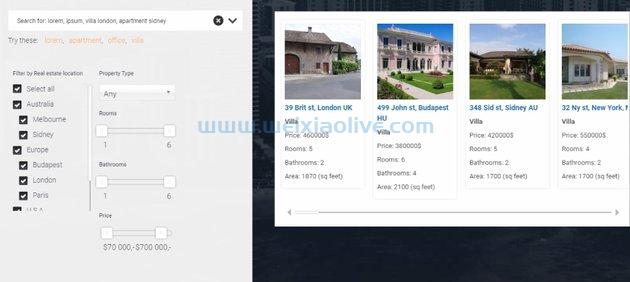
我们正在创建的主页或主页
HomeComponent将列出人口和地区等不同类别的前三个***。确定排序顺序的数据将取自COUNTRIES我们在上一个教程中创建的数组。
创建 HomeComponent 类
要创建HomeComponent,请将控制台中的目录更改为您的应用程序文件夹并运行以下命令:
ng generate component home
这将在文件夹内创建一个名为 home 的src/app文件夹,其中包含四个文件。对于这个应用程序,我们只需要关注三个名为 home.component.ts、和的文件。该文件将包含组件的所有逻辑,css 和 html 文件将控制组件的外观和结构。home.component.csshome.component.htmlhome.component.ts
让我们从编辑home.component.ts文件开始。应该显示存储在数组 中的HomeComponent前三个人口最多的***、三个最大的***和三个 GDP 最高的***。COUNTRIES
我们将导入 我们在上一个教程中创建的Country类和 类。CountryService我们还将导入 Component和OnInit 从 @angular/core. OnInit 依赖项提供了一个生命周期钩子,在初始化指令的数据绑定属性后立即调用该钩子。
导入所有必要的依赖项后,我们将定义我们的组件装饰器。组件装饰器用于提供与我们的组件相关的必要元数据信息。我们将为装饰器内部的 selector、templateUrl和设置一个值。styleUrls
选择器用于指定将用于标识我们的组件的标签。templateUrl用于在 Angular 遇到提供的选择器时提供要呈现的模板的 URL 。该styleUrls属性用于指定应应用于给定模板的不同样式表。这是home.component.ts到目前为止的代码:
import { Component, OnInit } from '@angular/core';

import { Country } from '../country';
import { CountryService } from '../country.service';

@Component({
  selector: 'app-home',
  templateUrl: './home.component.html',
  styleUrls: [ './home.component.css' ]
})现在我们将开始定义HomeComponent具有不同属性和方法的类,以帮助我们向用户显示***数据。该类HomeComponent将具有三个不同的属性,它们将接受一系列***作为其值。我们可以通过指定依赖类型的构造函数参数在组件的构造函数中注入依赖。这就是我们将如何将CountryService类注入到我们的HomeComponent.
以下是该文件的其余代码home.component.ts:
export class HomeComponent implements OnInit {
  populatedCountries: Country[] = [];
  largestCountries: Country[] = [];
  gdpCountries: Country[] = [];

  constructor(private countryService: CountryService) { }

  ngOnInit() {
    this.setPopulatedCountries();
    this.setLargestCountries();
    this.setGDPCountries();
  }

  setPopulatedCountries(): void {
    this.populatedCountries = this.countryService.getPopulatedCountries();
  }

  setLargestCountries(): void {
    this.largestCountries = this.countryService.getLargestCountries();
  }

  setGDPCountries(): void {
    this.gdpCountries = this.countryService.getGDPCountries();
  }
}我们创建了三种方法,使用CountryService该类来获取面积最大、人口最多和 GDP 最高的***/地区。然后将不同方法返回的数组CountryService分配给HomeComponent类的相应属性。
您应该注意,所有这些设置 、 和 值populatedCountries的largestCountries方法gdpCountries都在方法内部调用,ngOnInit()以便在创建组件后立即使用它们的值。
创建 HomeComponent 模板
编写完HomeComponent类的代码后,就该为组件创建 HTML 模板了。由于里面的代码home.component.html大部分是 HTML,我将只解释特定于 Angular 的部分。这是整个文件的代码:
<div class="container">
  <h2>Three Most Populated Countries</h2>
  <div class="group">
    <a *ngFor="let country of populatedCountries" class="country-unit" routerLink="/detail/{{country.name}}">
      <div class="country-block">
        <h4>{{country.name}}</h4>
        <p>{{country.population | number}}</p>
        <p>People</p>
      </div>
    </a>
  </div>
  <br>
  <h2>Three Largest Countries (Area)</h2>
  <div class="group">
    <a *ngFor="let country of largestCountries" class="country-unit" routerLink="/detail/{{country.name}}">
      <div class="country-block">
        <h4>{{country.name}}</h4>
        <p>{{country.area | number}} km
          <sup>2</sup>
        </p>
      </div>
    </a>
  </div>
  <br>
  <h2>Countries with Highest GDP</h2>
  <div class="group">
    <a *ngFor="let country of gdpCountries" class="country-unit" routerLink="/detail/{{country.name}}">
      <div class="country-block">
        <h4>{{country.name}}</h4>
        <p>{{country.gdp | number}} USD</p>
      </div>
    </a>
  </div>
</div>正如我之前解释过的populatedCountries,largestCountries、 和gdpCountries 已经被分配了一个对象数组Country作为它们的值。我们使用该NgFor指令遍历特定数组中的所有***,并显示它们的名称和各自的属性。例如, *ngFor="let country of populatedCountries"循环遍历数组中的所有***对象populatedCountries并将该值分配给局部变量country。该指令还为数组中的每个***对象呈现相应的a标签以及其中的所有其他标签。populatedCountries相同的解释适用于通过迭代largestCountries和呈现的所有***块gdpCountries。
我们正在使用Angular 管道来正确格式化不同***的人口、面积和 GDP 值,以使其更具可读性。您可能会感到困惑的一件事是routerLink我与所有a标签一起使用的指令。当我们编写代码以在应用程序的不同组件或部分之间进行遍历时,我们将在本系列的最后一个教程中更详细地讨论它。该routerLink指令的值就像我们在访问的网站上遇到的常规链接。重要的区别在于,我们将加载组件,而不是加载页面。
为 HomeComponent 创建 CSS 文件
最后,您可以编写一些 CSS 来使 HTML 模板更美观。这是我用于HomeComponent. 请记住,此 CSS 需要进入home.component.css文件内部。
body {
  font-family: 'Lato';
}

h2, h3, h4, p {
  font-family: 'Lato';
  margin: 10px;
}

.country-block p {
  margin-top: 0;
  margin-bottom: 0;
}

.country-block h4 {
  margin-bottom: 10px;
}

h4 {  position: relative;  font-size: 1.25rem;
}
.container {
  margin: 0 50px;
  text-align: center;
}

.country-unit {
    width: 200px;
    display: inline-block;
    margin: 10px;
}

br {
  clear: both;
}

.country-block {
    padding: 30px 0;
    text-align: center;
    color: white;
    height: 150px;
    background-color: #795548;
    border-radius: 2px;
}

.country-block:hover {
  background-color: #9C27B0;
  cursor: pointer;
  color:white;
}
重要的是内部的 CSShome.component.css仅应用于home.component.html文件内部的元素。
您可能希望HomeComponent通过将文件的内容更改为以下内容来在应用程序外壳 中呈现app.component.html:
<h1>{{title}}</h1><app-home></app-home>不幸的是,您在尝试这样做时会收到以下错误:
Can't bind to 'routerLink' since it isn't a known property of 'a'.
我们将在本系列的第五篇教程中更多地讨论routerLink指令以及如何摆脱这个错误。现在,您可以routerLink从home.component.html文件中删除所有提及的内容以运行您的 Angular 应用程序而不会出现任何错误。只需确保将所有内容添加回文件即可。
最后的想法
如果您以前从未创建过 Angular 应用程序,那么熟悉组件将需要一些时间。为了便于理解,您可以考虑类似于加载到网页中的不同 iframe 的组件。文件包含组件的.ts逻辑,就像 .js文件包含 iframe 的逻辑一样。
这些.html文件包含您要在 iframe 或组件内呈现的元素,并且这些.css文件包含这些元素的不同样式规则。我承认这不是一个非常准确的比较,但它应该可以帮助初学者理解组件以及组件不同文件之间的关系。




![如何删除Word中的空白页[4种简单方法] 如何删除Word中的空白页[4种简单方法]](https://www.weixiaolive.com/en/zb_users/upload/2023/07/20230702124855168827333590644.png)

