在本系列中,您将学习如何使用 react Native 创建移动应用程序中常用的页面布局。您将要创建的布局不会是功能性的——相反,本系列的主要重点是让您在 React Native 应用程序中布局内容。
为了跟随本系列,我挑战您先尝试自己重新创建每个屏幕,然后再阅读本教程中的分步说明。仅仅通过阅读本教程,您不会真正受益于它!在此处查找答案之前先尝试。如果你成功地让它看起来像原始屏幕,将你的实现与我的进行比较。然后自己决定哪个更好!
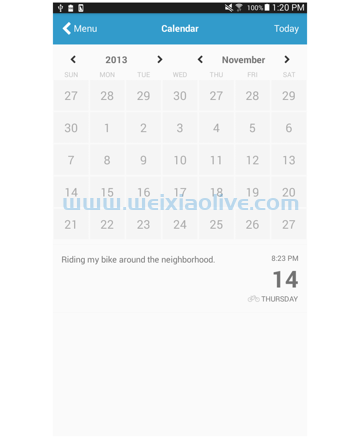
在本系列的第二部分中,您将创建以下日历页面:
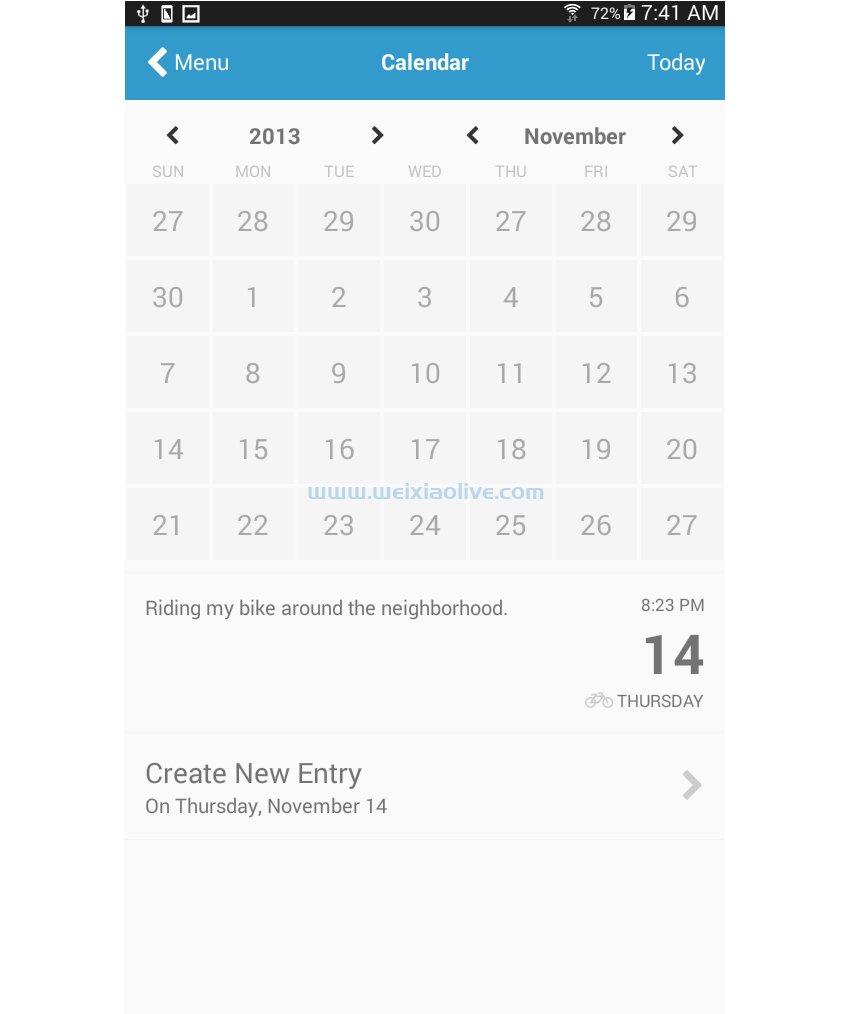
日历应用程序用于跟踪用户添加的事件和约会。您会在野外发现不同的变化,但它们中的大多数将具有与物理日历相同的元素:当前月份和年份、月份中的日期以及用户添加的事件或约会。
以下是此类布局的几个示例:
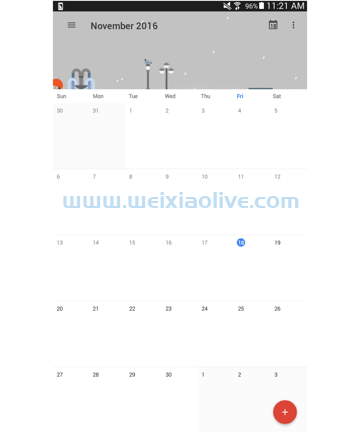
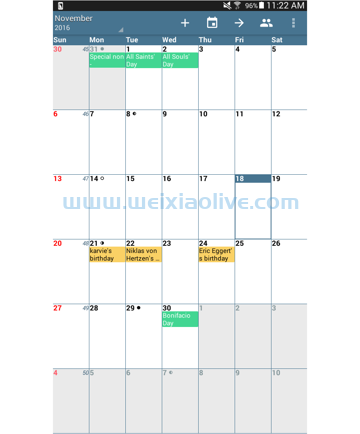
项目设置
第一步,当然是建立一个新的 React Native 项目:
react-native init react-native-common-screens
设置项目后,打开 文件并将默认代码替换为以下内容:index.android.js
import React, { Component } from 'react';
import {
  AppRegistry
} from 'react-native';

import Calendar from './src/pages/Calendar';

export default class ReactNativeCommonScreens extends Component {

  render() {
    return (
      <Calendar />
    );
  }

}

AppRegistry.registerComponent('ReactNativeCommonScreens', () => ReactNativeCommonScreens);
创建一个 src/pages 文件夹并Calendar.js 在其中创建一个文件。
你还需要这个 react-native-vector-icons 包。这专门用于导航图标以及页面中需要的其他图标。
npm install --save react-native-vector-icons
打开 android/app/build.gradle 文件并添加对包的引用:
dependencies {
    //rest of the dependencies are here at the top
    compile project(':react-native-vector-icons') //add this
}
android/settings.gradle 通过在底部添加以下内容对文件执行相同 操作:
include ':react-native-vector-icons'
project(':react-native-vector-icons').projectDir = new File(rootProject.projectDir, '../node_modules/react-native-vector-icons/android')
打开 android/app/src/main/java/com/react-native-common-screens/MainApplication.java 并导入包:
import java.util.Arrays;
import java.util.List;

import com.oblador.vectoricons.VectorIconsPackage; //add this
最后,初始化包:
@Override
protected List<ReactPackage> getPackages() {
  return Arrays.<ReactPackage>asList(
      new MainReactPackage(),
      new VectorIconsPackage() //add this
  );
}
创建日历页面
好的,既然您已经尝试自己编写布局代码(没有作弊,对吗?),我将向您展示我是如何构建我的实现的。
起初,我认为这将是最难实现的,但相信我,只要你已经了解了基础知识,它真的没那么复杂。这里有几个机会可以使用javascript代码来帮助渲染。
首先包括您需要的所有组件和包:
import React, { Component } from 'react';

import {
  StyleSheet,
  Text,
  View,
  ScrollView
} from 'react-native';

import Icon from 'react-native-vector-icons/fontAwesome';
import { range } from 'lodash';
import Button from '../components/Button';
这次有一个你还没有安装的新包,那就是 lodash。你真的不需要整个 lodash 库,只需要range 函数。这用于根据特定范围生成数字数组。npm install --save lodash.range 您可以通过在终端上执行来安装此功能 。
添加用于创建页面的样板代码:
export default class Calendar extends Component {
    render() {
    	return (
			<ScrollView style={styles.container}>
			    ...
			</ScrollView>
		);
	}
}const styles = StyleSheet.create({
	container: {
		flex: 1
	}
});
标题中包含三个元素:返回上一页的按钮、当前页面的标题和显示当前所选日期的人性化表示的文本。
<View style={styles.header}>
    <Button
		noDefaultStyles={true}
		onPress={this.press.bind(this)}
		styles={{button: styles.header_item}}
	>
        <View style={styles.header_button}>
        	<Icon name="chevron-left" size={30} color="#FFF" />
        	<Text style={[styles.header_text]}> Menu</Text>
        </View>
    </Button>
    <View style={styles.header_item}>
    	<Text style={[styles.header_text, styles.text_center, styles.bold_text]}>Calendar</Text>
    </View>
	<View style={styles.header_item}>
    	<Text style={[styles.header_text, styles.text_right]}>Today</Text>
    </View>
</View>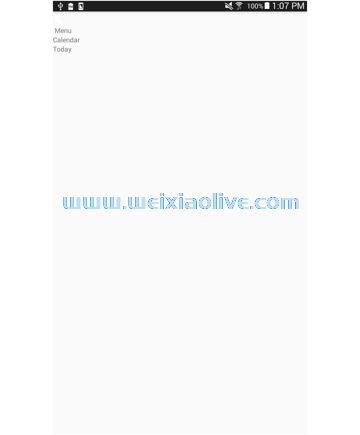
header 有一个 flexDirection of row 以便每个 header_item 水平堆叠。为它们中的每一个分配相同的 flex 值,因此它们占用相同的空间。 text_center 并 text_right 用于将这些 header_items 内的文本对齐到中心和右侧。这样做是因为默认情况下它们在容器的最左侧对齐。
header: {
    backgroundColor: '#329BCB',
	flexDirection: 'row',
	padding: 20
},
header_item: {
	flex: 1
},
header_button: {
	flexDirection: 'row'
},
text_center: {
	textAlign: 'center'
},
text_right: {
	textAlign: 'right'
},
header_text: {
	color: '#fff',
	fontSize: 20
},
bold_text: {
	fontWeight: 'bold'
},
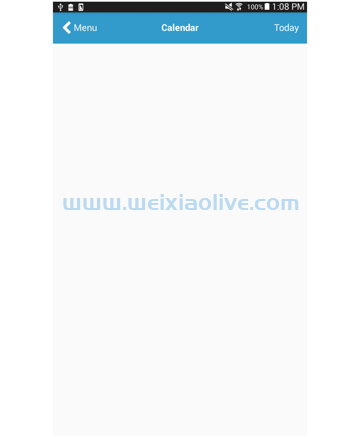
添加样式后,它现在应该如下所示:
接下来是实际的日历,它分为三个部分:表头、星期几和日历日:
<View>
    <View style={styles.calendar_header}>
        ...
    </View>
    <View style={styles.calendar_weekdays}>
        ...
    </View>
    <View style={styles.calendar_days}>
        ...
    </View>
</View>
日历标题允许用户更改年份和月份。
至少有两种方法可以实现这一点。第一种方法是将每个元素视为单个项目并应用于 justifyContent: 'space-between' 其容器。第二种方法是将所有与年份有关的元素分组,将与月份有关的元素分组。
第二种方法是下面应用的方法。从语义上讲,这更有意义,因为用于向后导航一年的按钮、年份本身和用于向前导航的按钮都是相关的,因此您可以通过将它们放在同一个容器中来将它们视为一个单独的东西。月份控件也是如此。
<View style={styles.calendar_header}>
    <View style={styles.calendar_header_item}>
        <Button
    		noDefaultStyles={true}
    		onPress={this.press.bind(this)}
    	>
            <Icon name="chevron-left" size={18} color="#333" />
        </Button>
    	<Text style={styles.calendar_header_text}>2013</Text>
    	<Button
    		noDefaultStyles={true}
    		onPress={this.press.bind(this)}
    	>
            <Icon name="chevron-right" size={18} color="#333" />
        </Button>
    </View>

    <View style={styles.calendar_header_item}>
    	<Button
    		noDefaultStyles={true}
    		onPress={this.press.bind(this)}
    	>
            <Icon name="chevron-left" size={18} color="#333" />
        </Button>
    	<Text style={styles.calendar_header_text}>November</Text>
    	<Button
    		noDefaultStyles={true}
    		onPress={this.press.bind(this)}
    	>
            <Icon name="chevron-right" size={18} color="#333" />
        </Button>
    </View>
</View>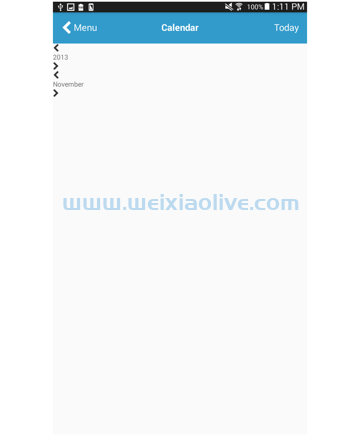
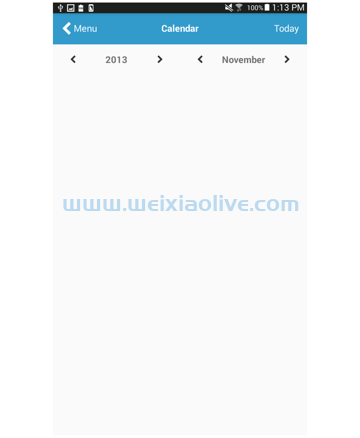
从那里,您可以将相同的技术应用于同一行中的这两组组件。要在两个按钮(后退和前进)和标签之间添加空格,我们使用 justifyContent: 'space-between'. 我们用来 alignItems: 'center' 将其中的所有元素推向中心。最后,我们添加左右填充以在两组之间添加更多空间。
calendar_header: {
    flexDirection: 'row'
},
calendar_header_item: {
	flex: 1,
	flexDirection: 'row',
	justifyContent: 'space-between',
	alignItems: 'center',
	paddingTop: 20,
	paddingRight: 40,
	paddingLeft: 40
},
calendar_header_text: {
	fontWeight: 'bold',
	fontSize: 20
},
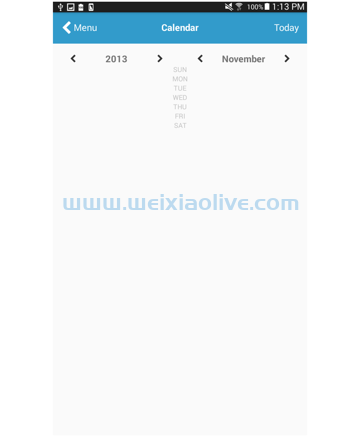
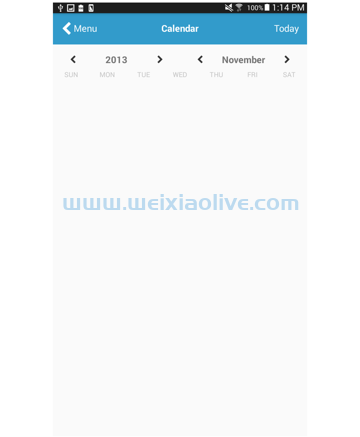
接下来是工作日。我们使用一个函数来呈现这些,因为最好使用一些 JavaScript 代码来呈现所有元素。
<View style={styles.calendar_weekdays}>
    { this.renderWeekDays() }
</View>
因此,您可以只使用一个包含星期几的数组,而不是在一周中的每一天渲染七个 View 或 组件。 然后,您可以使用该函数Text遍历那些日子 。Array.map()对于每次迭代,渲染一个 Text 显示当天的组件。
renderWeekDays() {
    let weekdays = ['sun', 'mon', 'tue', 'wed', 'thu', 'fri', 'sat'];
	return weekdays.map((day) => {
		return (
			<Text key={day} style={styles.calendar_weekdays_text}>{day.toUpperCase()}</Text>
		);
	});
}
请注意,在上面的代码中,该 toUpperCase() 函数用于将每天的所有字母转换为大写。React Native 不附带 css属性,因此这是除了手动使用大写字符串之外实现大写字母的唯一方法。text-transform
这是日历标题的样式:
calendar_weekdays_text: {
    flex: 1,
	color: '#C0C0C0',
	textAlign: 'center'
},
日历日还使用一个函数来呈现日期:
<View style={styles.calendar_days}>
    { this.renderWeeks() }
</View>
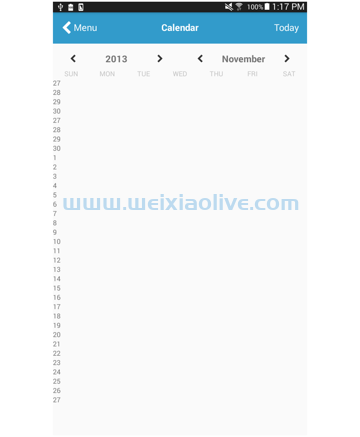
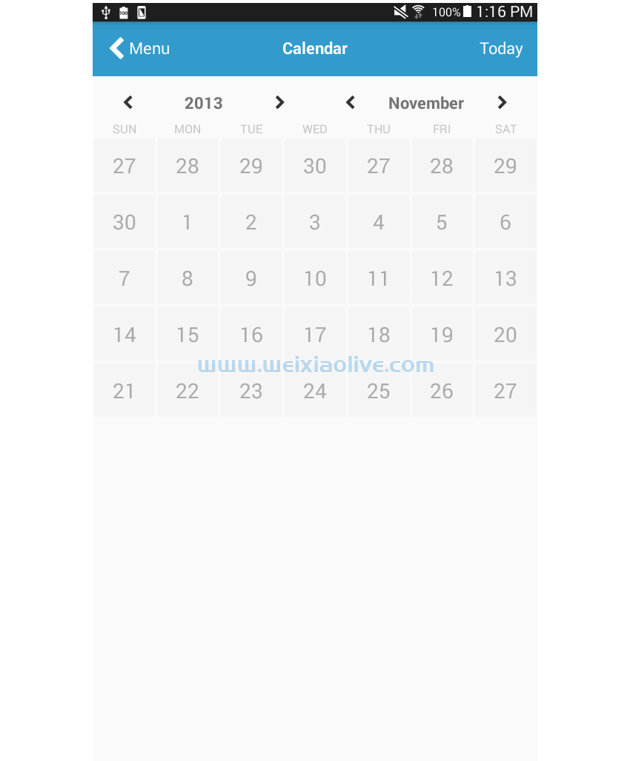
该 renderWeeks() 函数使用 range() lodash 中的函数生成一个数组,其中包含上个月的天数和当月的天数。然后将这两个数组合并在一起。
但是,您不能直接将结果数组用作日历日的数据源。那是因为如果你只是简单地循环遍历这些项目并 Text 为每一天输出一个组件,那么每周之间就不会有任何区别。您已经知道要使每个日历日内联,您需要应用 flexDirection: 'row' 到它的容器。因此,将其应用于单个容器将导致将所有日历日放在一行中。
这意味着您需要每周都有一个单独的容器。问题是如何。同样,至少有两种方法可以做到这一点。
第一种方法是让一个变量存储当前输出的天数,然后添加一个条件语句,该语句将在 <View> 每次变量包含时 呈现开场,并在 每次它 时呈现0 闭幕 。一旦它 ,将其重置回 。这是最直接的方法。</View>770
但我将在这里使用不同的方法。下面,该 getWeeksArray() 函数用于实现它。此函数接受天数组并将它们分组为每个包含 7 天的数组。从那里,您可以遍历每个数组以呈现周容器。然后对于每次迭代,您再次循环遍历一周内的天数以呈现这些天数。这就是 renderDays() 函数的作用。
renderWeeks() {
    let past_month_days = range(27, 31);
	let this_month_days = range(1, 30);

	let days = past_month_days.concat(past_month_days, this_month_days);
	let grouped_days = this.getWeeksArray(days);

	return grouped_days.map((week_days, index) => {
		return (
			<View key={index} style={styles.week_days}>
				{ this.renderDays(week_days) }
			</View>
		);
	});
}
这是 getWeeksArray() 功能:
getWeeksArray(days) {
    var weeks_r = [];
	var seven_days = [];
	var count = 0;
	days.forEach((day) => {
	  count += 1;
	  seven_days.push(day);
	  if(count == 7){
	    weeks_r.push(seven_days)
	    count = 0;
	    seven_days = [];
	  }
	});
	return weeks_r;
}
这是 renderDays() 功能:
renderDays(week_days) {
    return week_days.map((day, index) => {
		return (
			<Button
				label={day}
				key={index}
				onPress={this.press.bind(this)}
				styles={{button: styles.day, label: styles.day_text}}
				noDefaultStyles={true}
			/>
		);
	});
}
添加每周 ( week_days) 和每一天 ( day and day_text) 的样式:
week_days: {
    flexDirection: 'row'
},
day: {
	flex: 1,
	backgroundColor: '#F5F5F5',
	padding: 17,
	margin: 2
},
day_text: {
	textAlign: 'center',
	color: '#A9A9A9',
	fontSize: 25
},
接下来是用户为当前选定的日期和选定的日期和时间添加的注释。同样,最好根据目的对元素进行分组,而不是根据它们在页面中的放置方式。当然,所有这些元素都是相关的,所以我们将它们放在同一个容器中。但仔细观察,您会开始发现您可以将它们进一步分组:实际注释和选定日期。考虑到这一点,这是您最终会得到的标记:
<View style={styles.notes}>
    <View style={styles.notes_notes}>
		<Text style={styles.notes_text}>Riding my bike around the neighborhood.</Text>
	</View>
	<View style={[styles.notes_selected_date]}>
		<Text style={styles.small_text}>8:23 PM</Text>
		<Text style={styles.big_text}>14</Text>
		<View style={styles.inline}>
			<Icon name="bicycle" size={20} color="#CCC" />
			<Text style={styles.small_text}> THURSDAY</Text>
		</View>
	</View>
</View>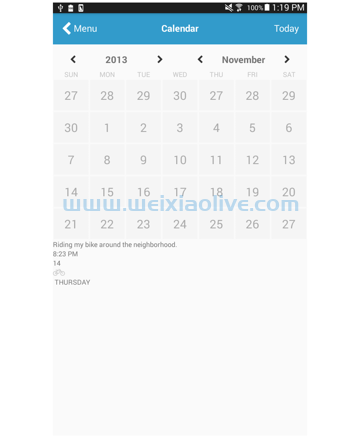
所选日期占用的空间比注释少,因此您必须对注释应用更大的 flex 值。 flex: 3 和 flex: 1 在这种情况下使用,这意味着笔记占用了可用空间的 3/4,选择的日期占用了 1/4。如果这对您更有意义,您也可以使用小数 (0.75 和 )。0.25重要的是选择一个标准并坚持下去。 alignItems: 'flex-end' 用于 notes_selected_date 使其所有子项都向右对齐。这是必需的,因为默认情况下它们与左侧对齐。
notes: {
    marginTop: 10,
	padding: 20,
	borderColor: '#F5F5F5',
	borderTopWidth: 1,
	borderBottomWidth: 1,
	flexDirection: 'row',
	backgroundColor: '#FAFAFA'
},
notes_notes: {
	flex: 3
},
notes_text: {
	fontSize: 18
},
notes_selected_date: {
	flex: 1,
	alignItems: 'flex-end',
	flexDirection: 'column'
},
small_text: {
	fontSize: 15
},
big_text: {
	fontSize: 50,
	fontWeight: 'bold'
},
inline: {
	flexDirection: 'row'
},
最后,我们添加日志,与上一个教程中的日志非常相似,所以我将留给您弄清楚布局是如何实现的!
<View style={styles.logs}>
    <View>
		<Text style={styles.log_text}>Create New Entry</Text>
		<Text style={styles.log_subtext}>On Thursday, November 14</Text>
	</View>
	<Button
		noDefaultStyles={true}
		onPress={this.press.bind(this)}
	>
		<Icon name="chevron-right" size={30} color="#CCC" />
	</Button>
</View>
以下是样式:
logs: {
    flexDirection: 'row',
	justifyContent: 'space-between',
	alignItems: 'center',
	padding: 20,
	borderColor: '#F5F5F5',
	borderBottomWidth: 1
},
log_text: {
	fontSize: 25
},
log_subtext: {
	fontSize: 18
}
结论
而已!在本教程中,您创建了一个日历页面。我们已经为应用程序制作了一个不错的日历布局,并且我已经向您展示了如何使用 JavaScript 代码来弥补 flexbox 的一些限制。
如您所见,我们需要一种将连续天数限制为仅 7 天的方法。Flexbox 没有办法指定这一点,所以我们使用 JavaScript 来重建原始的天数组,将它们分成一组,每组包含 7 天。从那里开始,我们所要做的就是将每个组包装在 a 中View ,然后应用 flexDirection: 'row'以使它们中的每一个呈现在自己的行中。




![如何删除Word中的空白页[4种简单方法] 如何删除Word中的空白页[4种简单方法]](https://www.weixiaolive.com/en/zb_users/upload/2023/07/20230702124855168827333590644.png)

