自从 iphone出现以来,推送通知就在重要事件的预定时间通知用户方面发挥了至关重要的作用,无论是 Skype 消息或电话通知、Twitter 上的直接消息还是游戏警报。通过精心设计的分段推送通知,营销人员提高了应用参与度和用户保留率。您可以通过利用 FCM 来执行相同的操作:
利用人口统计和用户行为定位预定义或自定义用户细分
提供即时或预定的推送通知
将 FCM 集成到 Google Analytics 中,以提供详细的对话监控并执行 A/B 测试
创建一个完全沉浸式的即时消息应用程序
假设知识
本教程假设您具备 ios 和 swift 的工作知识,以及一些使用 CocoaPods 的基本经验。如果您需要了解更多信息,请查看我们的 Swift 教程 和 CocoaPods 教程。
本文的目标
在本文中,您将了解有关 FCM 的所有信息,因为我们将涵盖以下主题:
FCM项目的设置
为 FCM 配置环境
接收和处理消息
向您的设备发送消息
主题和群组消息传递
定位细分和分析
什么是 firebase 云消息传递 (FCM)?
简而言之,Firebase Cloud Messaging(或简称 FCM)是来自 Google 的跨平台云消息传递和通知解决方案,使开发人员能够通过 Firebase Notification Composer 或 Firebase 公开的 api 集向其应用的最终用户发送推送通知. FCM 支持两种类型的消息:通知消息和数据消息。

通知消息是显示在用户设备上的显式推送通知消息,用于通知或征求参与,例如 Facebook Messenger 消息通知。相比之下,数据消息由应用程序在后台直接处理,可用于更新表视图,而无需应用程序在前台。
通过消息定向,FCM 可以将消息传递到单个设备、设备组或订阅主题的设备。目标群体直接与 Firebase Analytics 集成,这样您就可以跟踪参与度和转化率,打造有目的的客户群。接下来,我们将完成为 iOS 设置 Firebase 项目的过程。
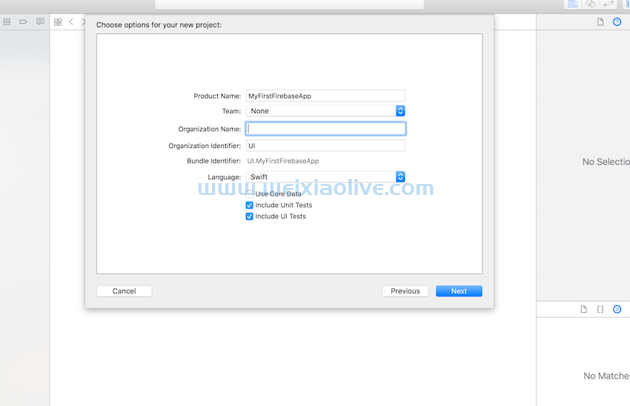
设置项目
在本系列中,我们将构建一个简单的应用程序,除了触发和接收来自 FCM 的消息之外,它不会做太多事情。让我们从 GitHub 克隆项目开始:
$ git@github.com:doronkatz/get-started-with-fcm-for-ios.git
...
$ git fetch --all --tags
...
$ git checkout tags/START
打开 Podfile 根目录,您会注意到我们已经导入了必要的 Firebase 模块:
# Uncomment the next line to define a global platform for your project
platform :ios, '10.0'

target 'Firebase-FCM' do
  # Comment the next line if you're not using Swift and don't want to use dynamic frameworks
  use_frameworks!

  # Pods for Firebase-FCM
  pod 'Firebase/Core'
  pod 'Firebase/Messaging'
end
输入以下内容来构建 pod:
pod install
打开工作区 Firebase-FCM.xcworkspace,然后在浏览器中,转到 Firebase 面板 并创建一个新项目:

接下来,单击 将 Firebase 添加到您的 iOS 应用程序,它将逐步引导您完成在 Firebase 上注册您的应用程序的过程。

在某些时候,它会要求您将 GoogleService-info.plist 文件添加到您的 Xcode 项目中:

您已经通过 CocoaPods 添加了库,因此您可以跳过其余说明并返回 Firebase 控制台。
在 Xcode 中,打开 AppDelegate.swift ,你会看到我们已经通过导入 Firebase 初始化了项目并添加 FirebaseApp.configure():
import UIKit
import Firebase

@UIApplicationMain
class AppDelegate: UIResponder, UIApplicationDelegate {

    *var* window: UIWindow?


    func application(_ application: UIApplication, didFinishLaunchingWithOptions launchOptions: [UIApplication.LaunchOptionsKey: Any]?) -> Bool {
        /// Override point for customization after application launch./
        FirebaseApp.configure()
        return true
    }

...
构建并运行应用程序以确保没有错误,当应用程序不执行任何操作时,它会启动对 Firebase 的初始调用,确认您可以连接到云。接下来,我们将配置我们的 APN。
为 FCM 配置环境
FCM 使用 Apple 推送通知服务 (APNs) 来发送和接收消息,因此我们需要通过 APNs 启用推送通知。首先,在 Apple Developer Portal中,创建一个身份验证密钥。
创建 APNs 身份验证密钥
首先,转到Certificates > Identifiers & Profiles ,然后 在Keys下选择All:

现在,输入 APNs Auth Key的密钥描述,确保选择Apple Push Notifications service (APNs)。将此密钥存储在安全的地方,因为这是一次性下载。
接下来,您需要创建一个 App ID,以便可以识别您的应用程序。 从导航菜单中选择 标识符>应用程序 ID ,然后单击+按钮添加新的 iOS 应用程序 ID。为您的应用输入描述和 App ID 后缀,与您在 Xcode 项目中的内容相匹配。确保您还在 服务复选框中选择了推送通知。

返回您的 Firebase 面板 ,在Project Settings下,选择Cloud Messaging选项卡。在iOS 应用配置中的APNs 身份验证密钥下,单击上传按钮。现在上传您从 Apple Developer Portal下载的 APNs 身份验证密钥。

在应用程序中授权推送通知
在您的 AppDelegate.swift中,添加以下代码:
import UserNotifications

@UIApplicationMain
class AppDelegate: UIResponder, UIApplicationDelegate, UNUserNotificationCenterDelegate {

    var window: UIWindow?


    func application(_ application: UIApplication, didFinishLaunchingWithOptions launchOptions: [UIApplication.LaunchOptionsKey: Any]?) -> Bool {
        /// Override point for customization after application launch.
        FirebaseApp.configure()

        UNUserNotificationCenter.current().delegate = self

        let authOptions: UNAuthorizationOptions = [.alert, .badge, .sound]

        UNUserNotificationCenter.current().requestAuthorization(options: authOptions) { (_, error) in
            guard error == nil else{
                print(error!.localizedDescription)
                return
            }
        }

        application.registerForRemoteNotifications()
        return true
    }
在这里,我们正在导入 UserNotifications、声明我们的实施意图 UNUserNotificationCenterDelegate,并使用 UNUserNotificationCenter.current().requestAuthorization().
除了我们之前生成的 APNs 令牌外,FCM 还会生成一个令牌,用于通过 messaging:didReceiveRegistrationToken:. 这是在应用程序启动期间检索的,并且每当令牌过期或以某种方式失效时都会更新令牌。
仍然在我们的 AppDelegate.swift 文件中,在声明下方添加以下内容 FirebaseApp.configure() :
class AppDelegate: UIResponder, UIApplicationDelegate {

    var window: UIWindow?
    let gcmMessageIDKey = "gcm.message_id"


    func application(_ application: UIApplication, didFinishLaunchingWithOptions launchOptions: [UIApplication.LaunchOptionsKey: Any]?) -> Bool {
        // Override point for customization after application launch.
        FirebaseApp.configure()
        Messaging.messaging().delegate = self

        UNUserNotificationCenter.current().delegate = self
        let authOptions: UNAuthorizationOptions = [.alert, .badge, .sound]
...
请注意,我们还添加 MessagingDelegate 了类声明。令牌 messaging:didReceiveRegistrationToken: 在您的应用程序启动时使用并被调用一次,并将结果发送到您的应用程序服务器。将以下内容添加到 didFinishLaunchingWithOptions: 方法的底部:
//Solicit permission from the user to receive notifications
        UNUserNotificationCenter.current().requestAuthorization(options: authOptions) { (_, error) in
            guard error == nil else{
                print(error!.localizedDescription)
                return
            }
        }

        //get application instance ID
        InstanceID.instanceID().instanceID { (result, error) in
            if let error = error {
                print("Error fetching remote instance ID: \(error)")
            } else if let result = result {
                print("Remote instance ID token: \(result.token)")
            }
        }

        application.registerForRemoteNotifications()
        return true
}在发送消息之前,我们需要明确要求用户接受推送通知。该 requestAuthorization(options: authOptions) 方法就是这样做的。当令牌确实被刷新时,您的应用程序会通过以下消息传递委托方法得到通知:
func application(_ application: UIApplication, didReceiveRemoteNotification userInfo: [AnyHashable: Any]) {
        if let messageID = userInfo[gcmMessageIDKey] {
            print("Message ID: \(messageID)")
        }

        // Print full message.
        print(userInfo)
    }

    func application(_ application: UIApplication, didFailToRegisterForRemoteNotificationsWithError error: Error) {
        print("Unable to register for remote notifications: \(error.localizedDescription)")
    }
最后一种方法允许您在前台接收消息,直接从 FCM 绕过我们的 APNs 代理。接下来,我们处理推送通知。
接收和处理消息
要接收通知,我们需要注册通知。当您的应用程序处于后台模式时,您的通知将传递到系统托盘,直到您的应用程序打开,此时通知数据包将 didReceiveRemoteNotification: 传递给AppDelegate. 接下来让我们实现它:
func messaging(_ messaging: Messaging, didReceiveRegistrationToken fcmToken: String) {
        print("Firebase registration token: \(fcmToken)")

        let dataDict:[String: String] = ["token": fcmToken]
        NotificationCenter.default.post(name: Notification.Name("FCMToken"), object: nil, userInfo: dataDict)
        // TODO: If necessary send token to application server.
        // Note: This callback is fired at each app startup and whenever a new token is generated.
    }

    func messaging(_ messaging: Messaging, didReceive remoteMessage: MessagingRemoteMessage) {
        print("Received data message: \(remoteMessage.appData)")
    }
测试是否收到 Firebase 注册令牌
构建并运行您的应用程序,确保您在物理设备上运行它,因为您无法在模拟器上接收推送通知。现在,该应用程序在视觉上没有任何作用,但如果您注意您的 Xcode 控制台,您应该会看到您已成功收到 Firebase 注册令牌 ID:

我们现在准备进入最后一步,向我们的应用程序发送消息。
向您的设备发送消息
在上一步中,我们应该已经成功运行了我们的应用程序,并且控制台中没有报告任何错误。在 Xcode 中再次构建并运行您的应用程序,但请确保您的应用程序在后台运行,而 Xcode 运行过程仍在运行,方法是向上滑动以进入您的主屏幕。
我们将使用 Firebase 的 Notifications composer创建一条消息,因此请在浏览器中前往那里,然后输入一些示例文本。确保为消息目标选择单个设备。

您会在撰写消息向导的整个过程中注意到,您还可以定位其他细分,甚至安排您的消息在未来某个日期发出。对于本练习,我们现在将发送一条消息。按发布 发送您的信息。看一眼你的手机,你应该会看到你的消息出现。

主题和群组消息
在本教程中,您了解了如何使用 FCM 接收推送通知,但我们只是触及了 FCM 可以做什么的皮毛。在我们的示例中,我们针对的是单个设备,但您很可能会针对 订阅特定组 或 关注特定主题的设备。
主题消息让您的用户订阅特定主题,例如您最喜欢的大学球队的实时比分或用户特定兴趣位置的天气更新。用户可以订阅无限数量的主题,FCM 针对吞吐量而不是延迟优化消息。有关使用主题消息传递的更多信息,请参阅 Firebase 文档的iOS 上的主题消息传递 部分。
如果您希望将消息发送到每个用户的多个设备,例如用户的 iPhone 和ipad, 设备群组消息 将更合适。设备群组消息使您能够将单个消息发送到在属于群组的设备上运行的应用程序的多个实例,其中群组通常意味着具有一组相关设备的单个用户,共享一个公共 FCM 通知密钥。有关这方面的更多信息,请参阅 Firebase 文档的iOS 设备组消息 部分。
对于任何一种消息类型,您都可以使用 Firebase 的Admin SDKs来采用更自动化和更复杂的消息触发形式 ,而不是使用 Notifications composer。
目标细分和分析
除了向主题和群组发送消息外,您还可以根据其他各种营销属性仔细定位用户细分。也就是说,您可以使用 FCM 运行 A/B 或其他类型的实验,以使您能够衡量和测试假设并观察关键参与度指标。
A/B 测试与 FCM 一起使用,以便您可以测试不同的营销信息,并与远程配置一起使用,以便您可以在应用程序中测试更改。(火力基地)
有关详细信息,请参阅 Firebase 关于 Firebase A/B 测试的文档。
您可以通过从我们的 GitHub 帐户克隆Firebase iOS 推送通知演示应用程序库来下载此项目的完整源代码。
结论
在本教程中,您了解了 Firebase 云消息传递,以及如何通过使用推送通知来吸引用户并提高留存率,从而轻松将您的 iOS 应用提升到新的水平。
FCM 不仅为您的应用程序与用户交流提供了一种方式,它还为您提供了一种令人信服的方式,让您可以采用复杂的营销策略,根据您可以制作的各种算法,在正确的时间向正确的用户发送消息. FCM 非常容易实施,但它提供了市场上无与伦比的复杂性和可扩展性。
- 创建 APNs 身份验证密钥
- 在应用程序中授权推送通知
- 测试是否收到 Firebase 注册令牌





![如何删除Word中的空白页[4种简单方法] 如何删除Word中的空白页[4种简单方法]](https://www.weixiaolive.com/en/zb_users/upload/2023/07/20230702124855168827333590644.png)

