在本教程中,您将学习如何使用 node.js 和 angular 6 进行身份验证和连接到 Twitter api。在本教程结束时,您将完成以下工作:
使用 Twitter API 进行身份验证
使用 Twitter API 阅读 Twitter 时间线
和更多!
创建节点服务器
我们将从构建一个节点服务器开始,该服务器将处理与 Twitter API 的交互。第一步是注册一个新的应用程序,以获得开始使用 Twitter API 的凭据。
只需访问https://apps.twitter.com/,创建一个新应用程序,然后填写所有必要的详细信息——即应用程序名称、描述和 URL。创建应用程序后,您需要为应用程序创建唯一密钥。为此,只需转到“ 密钥和访问令牌”选项卡,然后单击 位于页面底部的“创建我的访问令牌”按钮。
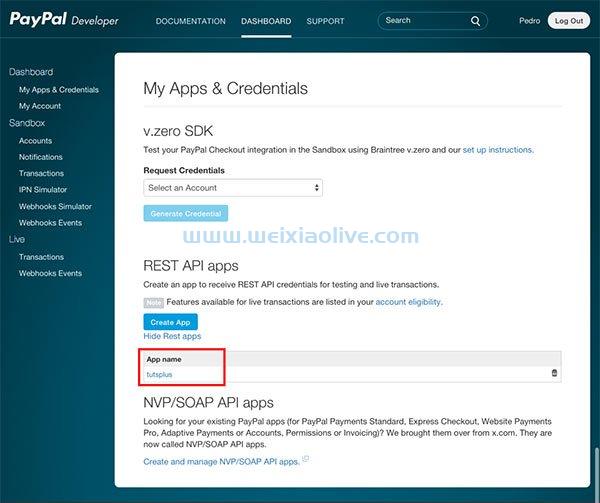
该应用程序将生成四个密钥,如下所示:
消费者密钥(API 密钥)
消费者秘密(API 秘密)
访问令牌
访问令牌秘密
请记下上面的键,因为它们稍后会派上用场。
为服务器代码创建一个目录,创建一个. 运行 .js文件,并创建一个server.js文件。npm init
mkdir server
cd server
npm init
touch server.js
然后,我们将安装twit包和引导 Express 应用程序所需的其余依赖项。
npm install twit body-parser cors express
该twit包将帮助我们与 Twitter API 进行交互。接下来,在server.js中,初始化模块,创建一个 Express 应用程序,然后启动服务器。
const express = require('express');
const Twitter = require('twit');
const app = express();

app.listen(3000, () => console.log('Server running'))
验证
然后,我们将为twit包提供 API 密钥,如下所示。
const api-client = new Twitter({
  consumer_key: 'CONSUMER_KEY',
  consumer_secret: 'CONSUMER_SECRET',
  access_token: 'ACCESS_TOKEN',
  access_token_secret: 'ACCESS_TOKEN_SECRET'
});
这些密钥对于您的应用程序是唯一的,并且与您的 Twitter 帐户相关联。因此,当您使用 Twitter API 发出请求时,您将成为授权用户。
然后,我们将创建端点以在我们的节点服务器上发布和检索推文。
Twitter 提供以下端点,使我们能够在检索和发布推文时与我们的 Twitter 时间线进行交互。
GET
statuses/home_timeline—返回用户和他们关注的用户最近发布的推文GET
statuses/home_timeline—返回验证用户的最新提及post——
statuses/update用于发布推文
检索推文
第一个端点将用于检索时间线上的最新推文。我们还将指定要检索的推文数量。
app.get('/home_timeline', (req, res) => {
    const params = { tweet_mode: 'extended', count: 10 };

    client
      .get(`statuses/home_timeline`, params)
      .then(timeline => {

        res.send(timeline);
      })
      .catch(error => {
      res.send(error);
    });

});
接下来是用于检索所有提及身份验证用户的推文的 API。
app.get('/mentions_timeline', (req, res) => {
    const params = { tweet_mode: 'extended', count: 10 };

    client
      .get(`statuses/mentions_timeline`, params)
      .then(timeline => {

        res.send(timeline);
      })
      .catch(error => {
      res.send(error);
    });

});
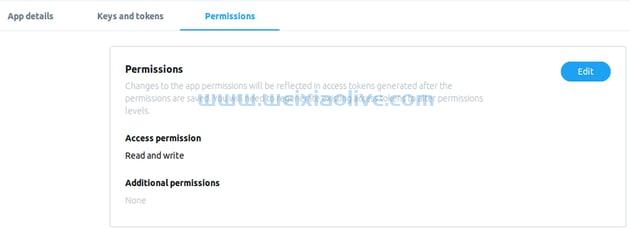
为了能够写入 Twitter 时间线,我们需要将应用 访问权限级别更改为读取和写入,如下所示。
发布推文
接下来,更新 server.js文件以调用用于发布推文的 API。
app.post('/post_tweet', (req, res) => {

  tweet = req.body;

    client
      .post(`statuses/update`, tweet)
      .then(tweeting => {
        console.log(tweeting);

        res.send(tweeting);
      })

     .catch(error => {
      res.send(error);
    });


});
我们现在已经完成了节点服务器,您现在可以使用 Postman 测试您的 rest API 以确保它正常工作。
测试后端
如果您 home_timeline在 API 中查询端点,您应该会看到类似以下内容。

这是对 mentions_timeline端点的 GET 请求:

我们上面创建的服务器代码也可用于创建 Twitter 机器人。下面是一个更新用户状态的基本 Twitter 机器人示例。
const express = require('express');
const Twitter = require('twit');

const app = express();
const client = new Twitter({
  consumer_key: 'Consumer Key Here',
  consumer_secret: 'Consumer  Secret  Here',
  access_token: 'Access Token Here',
  access_token_secret: 'Token  Secret Here'
});


app.use(require('cors')());
app.use(require('body-parser').json());

app.post('/post_tweet', (req, res) => {

  tweet = {status:"Hello world"};

    client
      .post(`statuses/update`, tweet)
      .then(timeline => {
        console.log(timeline);

        res.send(timeline);
      })

     .catch(error => {
      res.send(error);
    });


});

app.listen(3000, () => console.log('Server running'));
构建一个 Angular 应用程序以使用 REST API
我们现在将开始构建我们的 Angular 应用程序,它将使用来自我们的 Node 服务器的 API。
首先,创建一个 Angular 应用程序。
ng new client
推特服务
我们将首先创建一个向 Node 服务器发出请求的 Twitter 服务。在 Angular 应用程序中发出以下命令。
ng generate service twitterservice
这将创建两个文件,twitter.service.ts和twitter.service.spec.ts。打开twitter.service.ts,添加所需的导入,声明 API 端点,并 HttpClient在构造函数中注入模块。
api_url = 'https://localhost:3000';

  constructor(private http: HttpClient) { }
然后我们将定义使用 REST API 的函数。
export class TwitterService {

 api_url = 'http://localhost:3000';

  constructor(private http: HttpClient) { }

  getTimeline() {
    return this.http
      .get<any[]>(this.api_url+'/home_timeline')
      .pipe(map(data => data));

  }

  getMentions() {
    return this.http
      .get<any[]>(this.api_url+'/mentions_timeline')
      .pipe(map(data => data));

  }

}
从组件访问 Twitter 服务。
为了从我们的组件访问 Twitter 服务,我们需要生成以下组件。
ng generate component twitter_timeline
ng generate component twitter_mentions
ng generate component tweet
接下来,在app.module.ts中为生成的组件声明路由。
import { RouterModule, Routes } from '@angular/router';

const appRoutes: Routes = [
  {
    path: 'twitter_timeline',
    component: TwitterTimelineComponent
  },
  {
    path: 'twitter_mentions',
    component: TwitterMentionsComponent
  },

  {
    path: 'tweets',
    component: TweetComponent
  },

  { path: '',
    redirectTo: '',
    pathMatch: 'full'
  }
];现在打开app.component.html并渲染组件,如下所示。
<mat-toolbar color="primary">
   <mat-toolbar-row>
     <!--  <span>HOME</span> -->
      <span><a href="/">HOME</a></span>
      <span class="spacer"></span>
      <span mat-button  routerLink="/twitter_timeline">Timeline</span>
      <br>
      <a  mat-button  routerLink="/twitter_mentions">Mentions</a>
      <br>
      <a  mat-button  routerLink="/tweets">Tweets</a>
   </mat-toolbar-row>
</mat-toolbar>
<router-outlet></router-outlet>
检索推文
我们将创建两个组件来显示我们的推文。将TwitterTimelineComponent显示来自经过身份验证的用户的时间轴的最新推文,而 TwitterMentionsComponent将显示所有提到经过身份验证的用户的推文。
我们将从TwitterTimelineComponent. 更新 twitter-timeline.component.ts 如下:
export class TwitterTimelineComponent implements OnInit {

  myTimeline: any;

  constructor(private api: TwitterService) { }

  ngOnInit() {
   this.getTwitterTimeline();
  }

  getTwitterTimeline(): void {
    this.api.getTimeline()
      .subscribe(
        myTimeline => {
          this.myTimeline = myTimeline;
          console.log(this.myTimeline);
        }
      )
   }

}
该 getTwitterTimeline 方法使用TwitterService从经过身份验证的用户时间线中提取数据。然后我们更新 twitter-timeline.component.html ,如下所示。
<h1>Tweeter Timeline</h1>
<div *ngIf="undefined === myData">Loading...</div>
<div *ngIf="undefined !== myData">
  <div class ="card">
    <ng-container *ngFor="let tweets of myData.data">
      <h3>{{tweets.full_text
        }}
      </h3>
      <p>{{tweets.created_at}}</p>
      <p>{{tweets.user.name}}</p>
      <p>{{tweets.user.screen_name}}</p>
      <p>{{tweets.user.location}}</p>
      <p>{{tweets.user.description}}</p>
    </ng-container>
  </div>
</div>
在这里,我们遍历该 getTwitterTimeline 方法返回的数组,并为每条推文显示以下属性:
locationdescriptionusernamecreated_atscreen_name
然后我们转到 TwitterMentionsComponent并按如下方式对其进行更新。
export class TwitterMentionsComponent implements OnInit {

  myMentions: any;

  constructor(private api: TwitterService) { }

  ngOnInit() {
   this.getTwitterMentions();
  }

  getTwitterMentions(): void {
    this.api.getTimeline()
      .subscribe(
        myMentions => {
          this.myMentions = myMentions;
          console.log(this.myMentions);
        }
      )
   }

}
最后,我们需要在模板中显示来自 API 的数据。更新twitter-mentions.component.html 如下:
<h1>Tweeter Mentions</h1>
<div *ngIf="undefined === myData">Loading...</div>
<div *ngIf="undefined !== myData">
  <div class ="card">
    <ng-container *ngFor="let tweets of myData.data">
      <h3>{{tweets.full_text
        }}
      </h3>
      <p>{{tweets.created_at}}</p>
      <p>{{tweets.user.name}}</p>
      <p>{{tweets.user.screen_name}}</p>
      <p>{{tweets.user.location}}</p>
      <p>{{tweets.user.description}}</p>
    </ng-container>
  </div>
</div>
现在,当您运行该应用程序时,您应该会看到显示的推文的所有属性。
发布推文
We will start with the form for posting data to the /post_tweet endpoint, where we define an input field and a submit button for posting tweets. We will use the FormBuilder module to build our status update form. Add the following code to tweet.component.ts.
import { FormBuilder, FormGroup, Validators } from '@angular/forms';

export class TweetComponent implements OnInit {
tweetForm: FormGroup;

  constructor(private api: TwitterService private formBuilder: FormBuilder) { }

  ngOnInit() {

   this.tweetForm = this.formBuilder.group({
            tweetdata: ['', Validators.required]
        });
  }

}
Now update the template so that Angular knows which form to use.
<mat-card class="contact-card">
  <mat-card-content>
    <form [formGroup]="tweetForm" (ngSubmit)="onSubmit()">
    <mat-form-field>
      <input matInput placeholder="Status" formControlName="tweetdata"
      class="form-control" [ngClass]="{ 'is-invalid': 已提交 && f.tweetdata.errors }" >
    </mat-form-field>
    <br>
    <div class="form-group">
      <button [disabled]="loading" class="btn btn-primary">TWEET</button>
      <img *ngIf="loading" src="https://media.giphy.com/media/3oEjI6SIIHBdRxXI40/giphy.gif" />
    </div>
    </form>
  </mat-card-content></mat-card>
正如您在上面看到的,我们添加了验证器,因此如果表单为空,则无法提交。
然后,我们继续使用 Twitter 服务并对其进行更新,以包含用于将数据发布到 API 的代码。
  tweet(tweetdata: string) {
        return this.http.post<any>(`${this.api_url}/post_tweet/`, { status: tweetdata})
            .pipe(map(tweet => {

                alert("tweet posted")

                return tweet;
            }));
    }

}
然后,我们将更新 TweetComponent 以提供用于调用方法以发布到 Twitter API 的代码。将以下内容添加到 tweet.component.ts。
export class TweetComponent implements OnInit {
tweetForm: FormGroup;
    loading = false;
    submitted = false;
    returnUrl: string;
    error = '';

  constructor(private api: TwitterService private formBuilder: FormBuilder) { }

  ngOnInit() {

   this.tweetForm = this.formBuilder.group({
            tweetdata: ['', Validators.required]
        });
  }

  get f() { return this.tweetForm.controls; }

    onSubmit() {
        this.submitted = true;

        // stop here if form is invalid
        if (this.tweetForm.invalid) {
            return;
        }

        this.loading = true;
        this.api.tweet(this.f.tweetdata.value)
            .pipe(first())
            .subscribe(
                data => {
                    console.log("yes")
                },
                error => {
                    this.error = error;
                    this.loading = false;
                });
    }

}您现在应该能够通过点击/home_timeline 端点来检索最新的推文,通过端点检索您的提及 /mentions_timeline,并通过端点发布推文 /post_tweet。
结论
在本教程中,您学习了如何开始使用 Twitter API 以及如何使用几行代码构建一个简单的 Twitter 机器人。您还学习了如何从 Angular 连接 REST API,包括创建 API 服务和与该服务交互的组件。
- 验证
- 检索推文
- 发布推文
- 推特服务
- 从组件访问 Twitter 服务。




![如何删除Word中的空白页[4种简单方法] 如何删除Word中的空白页[4种简单方法]](https://www.weixiaolive.com/en/zb_users/upload/2023/07/20230702124855168827333590644.png)

