面向对象的代码,除其他外,可以帮助组织代码并增加代码的可重用性。在本教程中,我将教您使用面向对象技术编写 wordpress 插件的基础知识。我们将使用 Dribbble 的 api 作为本教程的示例。准备好?

我们要学什么:
将 OOP 用于 WordPress 插件的好处。
如何设置简码。
如何设置模板标签。
如何在 WordPress 小部件中启用简码。
使用 Dribbble 的 API 的真实示例。
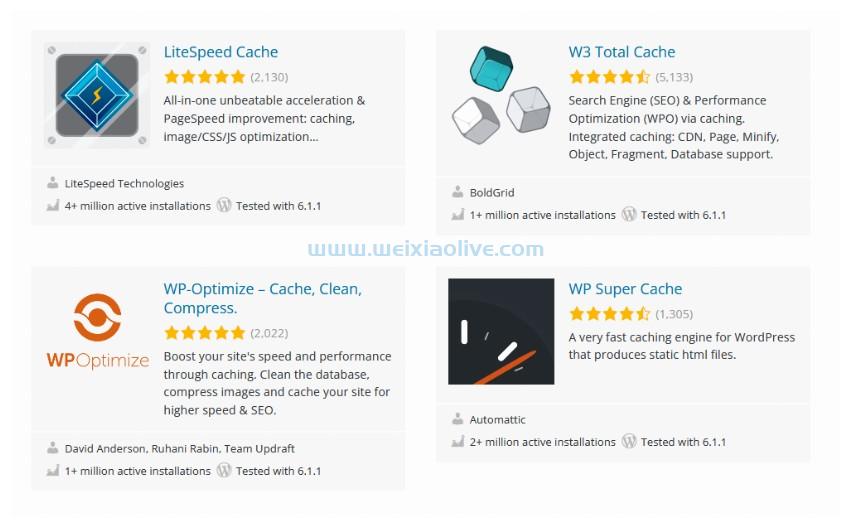
顺便说一下,如果这听起来太高级了,而您只是在寻找一些可以下载并在您的网站上使用的现成插件,请查看我们关于用于 SEO、备份、安全的最佳 WordPress 插件的免费课程和更多。
为什么使用 OOP?
与使用过程代码相比,使用面向对象代码创建 WordPress 插件非常高效和整洁。它更容易管理代码库,并使用继承技术扩展它,这在编写大型插件时特别有用。
滴滴
要编写 WordPress 插件,我们首先需要方向感。我们将使用他们的 rest API 编写一个插件来显示来自Dribbble的最新照片。然后,我们将为帖子和小部件添加短代码支持,并为主题添加模板标签。
1.设置插件类
面向对象的代码基于类和方法(函数)。让我们创建我们的核心类,它将与 WordPress 的钩子和过滤器交互。
<?php
class WPDribbble {
    public function __construct()
    {
    }
}

$wpDribbble = new WPDribbble();
PHP 类有一个构造函数,__construct它会在类的新实例被实例化时立即执行。所有 WordPress 挂钩和过滤器都将在我们的插件类的构造函数下注册。让我们继续为我们的插件注册一个简码。函数add_shortcode()/挂钩将在构造函数下。
使用关键字注册类的新实例new。请参阅下面代码中的最后一行。
<?php
class WPDribbble {
    public function __construct()
    {
        add_shortcode('Dribbble', array($this, 'shortcode'));
    }

    public function shortcode()
    {
    }
}

$wpDribbble = new WPDribbble();
add_shortcode:第一个参数是简码标签,第二个是回调函数。
注意到我们如何在回调函数参数中使用数组了吗?要在对象中注册回调函数,我们必须使用数组。
数组的第一项通过 引用对象$this。数组中的第二项是类中的方法名称。在类中时,必须像这样引用所有钩子和过滤器。
因此,每当Dribbble需要执行短代码时,它都会调用类shortcode的方法WPDribbble。
仍然感到困惑?
<?php
# 1. Standard usage
add_shortcode('shortcode_name', 'shortcode_func');

function shortcode_func()
{
 // Contents of this function will execute when the blogger
// uses the [shortcode_name] shortcode.
}

# 2. With PHP 5.3, we can pass an anonymous function.
add_shortcode('shortcode_name', function() {
   // Contents of this function will execute when the blogger
  // uses the [shortcode_name] shortcode.
});

#3. Within a class
class WPDribbble {
    public function __construct()
    {
        add_shortcode('Dribbble', array($this, 'shortcode'));
    }

    public function shortcode()
    {
           // Contents of this function will execute when the blogger
          // uses the [shortcode_name] shortcode.
    }
}
2. Dribbble API 类
由于我们目前不需要任何花哨的 API 函数,我们将为 Dribbble 创建一个相当简单的 API 包装器。已经有一个可用于 Dribbble 的库,但是,为了本教程,我们将编写自己的库。它将帮助您理解本教程背后的概念。
我们将编写一个DribbbleAPI对象,并注册一个调用的方法getPlayerShots()来与 Dribbble 的 API 进行交互,并返回一组最新的镜头。
让我们为这个类创建一个新文件,叫做DribbbleAPI.php
<?php
class DribbbleAPI {
    // url to Dribbble api
    protected $apiUrl = 'https://api.dribbble.com/';
}
在DribbbleAPI类中,我们设置了以下类变量:
$apiUrl:指向 Dribbble API 的链接,将在此处发送调用。
我们在属性或变量名称前加上前缀,public以指定可以从类外部检索该属性的值。相反,如果我们希望将对该属性的访问限制为仅此类,以及可能继承自它的任何类,我们将使用前缀protected。这种做法称为封装。在我们的例子中,我们将$apiUrl属性定义为protected属性。
我们已经为我们的 Dribbble API 包装器准备好了基础。现在,我们要编写一个新方法,称为getPlayerShots(). 此方法的目的是查询 API 并将结果转换为数组,以便在我们的插件中使用。
<?php
class DribbbleAPI
{
    // url to Dribbble api
    protected $apiUrl = 'http://api.dribbble.com/';

    public function getPlayerShots(int $user, int $perPage = 15) : array
    {
        $json = wp_remote_get($this->apiUrl . 'players/' . $user . '/shots?per_page=' . $perPage);

        $array = json_decode($json['body']);

        $shots = $array->shots;

        return $shots;
    }
}
了解有关wp_remote_get 的更多信息。
该getPlayerShots方法有两个参数。第一个参数是用户 ID,将在 API URL 中使用。第二个参数是限制值,用于对记录进行分页。
该getPlayerShots方法使用 WordPress 的wp_remote_get函数来查询 Dribbble API。然后 API 使用 JSON 字符串响应我们的查询,然后在函数的帮助下将其解析为数组json_decode并使用关键字发送回函数return。
这就是我们目前需要从 API 获得的全部内容 — 只是一组玩家投篮。如果将来我们碰巧需要更多的功能,我们可以在当前类中添加更多的方法,或者创建一个扩展这个类的新类。同样,这被称为继承。
3.整合DribbbleAPI班级
这是有趣的部分;新鲜出炉的DribbbleAPI课程即将投入使用。我们将遍历从 API 检索的镜头,并生成一个 html 镜头列表,该列表将传递给短代码和模板标签。在循环过程中,完整尺寸的 Dribbble 图片将被缓存并保存在插件文件夹中,缩略图将使用Imagine库生成。您可以阅读文档并按照说明进行安装。您还可以使用您选择的图像处理库来生成缩略图,您只需要对该getImages方法进行一些小的调整。
要确定完整图像是否已存储在本地,需要插件路径。此外,要使用 Imagine 库生成缩略图,需要插件 URL。为此,我们将在我们的类中创建两个名为pluginPath和的类变量,然后在构造方法中设置它们的值。pluginURLWPDribbble
我们还将创建dribbbleApiObject变量来保存DribbbleAPI对象,稍后我们可以在getImages方法中使用它。DribbbleAPI需要注意的是,我们在实例化类时必须传递对象WPDribbble。
设置类变量
<?php
class WPDribbble {
    protected $pluginPath;
    protected $pluginUrl;
    protected $dribbbleApiObject;

    public function __construct(DribbbleAPI $dribbbleApiObject) : void
    {
        // Set Plugin Path
        $this->pluginPath = dirname(__FILE__);

        // Set Plugin URL
        $this->pluginUrl = WP_PLUGIN_URL . '/wp-Dribbble';

        // Init DribbbleAPI Object
        $this->dribbbleApiObject = $dribbbleApiObject;

        add_shortcode('Dribbble', array($this, 'shortcode'));
    }
}
方法getImages()_
WPDribbble在类中创建一个名为getImages 的新方法。
在类内部,您可以为函数使用通用名称。它们不会与其他插件或 WordPress 的内置函数冲突,因为它们在类命名空间下。
public function getImages($user, $images = 3, $width = 50, $height = 50, $caption = true){}
$user - Dribbble 的用户名或用户 ID。$user将在注册该类的新实例时使用DribbbleAPI。
$images - 要渲染的图像数量。$images将在通过方法查询 API 时使用getPlayerShots。
$width 和 $height - 假设将用于生成缩略图。
$caption - 渲染图像标题的选项。
接下来,我们将把这个DribbbleAPI类包含在WPDribbble插件文件中,这样我们就可以创建它的一个新实例来抓拍。
...
require_once __DIR__ . '/DribbbleAPI.php';
...
DribbbleAPI接下来,让我们在实例化类时创建类的实例WPDribbble。
...
...
$wpDribbble = new WPDribbble(new DribbbleAPI());
...
...
如前所述,我们将遍历数组$shots,并在本地保存全尺寸图像以用于缓存目的。为了存储 Imagine 生成的完整图像和缩略图,创建两个文件夹。我们将使用全图存储全尺寸图像,并使用缩略图缓存。
列表的 HTML 将在$shots循环内生成。
public function getImages(int $user, int $images = 3, int $width = 50, int $height = 50, bool $caption = true) : string
{
    $shots = $this->dribbbleApiObject->getPlayerShots($user, $images);

    if($shots) {
        $html[] = '<ul class="wp-Dribbble">';

        foreach($shots as $shot) {
            $image = $shot->image_url; // url of the image
            $fileName = $shot->id . '.png'; // generating a filename image_id.png
            $thumbFileName = 'thumb_' .$shot->id . '.png';
            $destThumbFilePath = $this->pluginPath . '/cache/' .  $thumbFileName;

            if (!file_exists($this->pluginPath . '/full-images/' . $fileName)) { // check if the full image exists
                $rawImage = wp_remote_get($image); // get the full image
                $newImagePath = $this->pluginPath  . '/full-images/' . $fileName;
                $fp = fopen($newImagePath, 'x');
                fwrite($fp, $rawImage['body']); // save the full image
                fclose($fp);
            }

            // generate thumbnail url
            $imagine = new \Imagine\Gd\Imagine();
            $image = $imagine->open($newImagePath);
            $thumbnail = $image->thumbnail(new Imagine\Image\Box($width, $height));
            $thumbnail->save($destThumbFilePath);
            $destThumbURL = $this->pluginUrl . '/cache/' .  $thumbFileName;

            if($caption) { // if caption is true
                $captionHTML = '<p class="wp-Dribbble-caption">' . $shot->title . '</p>';
            }

            // combine shot url, title and thumbnail to add to the ul list
            $html[] = '<li class="wp-Dribbble-list"><a href="' . $shot->url . '" title="' . $shot->title . '"><img src="' . $destThumbURL . '" alt="' . $shot->title . '" /></a>'.$captionHTML.'</li>';
        }

        $html[] = '</ul>';

        return implode("\n", $html);
    }
添加类
向插件的每个元素添加类总是一个好主意。这为您的插件的高级用户提供了自定义它的自由。避免对通过插件生成的内容使用内联 css。
4.设置简码
简码,顾名思义,允许用户轻松地将复杂的内容添加到博客文章中。
我们已经add_shortcode在我们的插件类构造函数中准备好了钩子。现在,我们将method在我们的 中编写短代码class,它将提取短代码属性并使用该getImages()方法返回 Dribbble 图像。
我们将调用我们的简码[Dribbble]。如前所述,短代码的名称由函数中的第一个参数决定add_shortcode。它将与getImages()方法所需的属性一起使用。例如:[Dribbble user=haris images=5 width=100 height=100 caption=true]。
public function shortcode($atts)
{
    // extract the attributes into variables
    extract(shortcode_atts(array(
        'images' => 3,
        'width' => 50,
        'height' => 50,
        'caption' => true,
    ), $atts));

    // pass the attributes to getImages function and render the images
    return $this->getImages($atts['user'], $images, $width, $height, $caption);
}
添加对 WordPress 小部件的简码支持
默认情况下,WordPress 小部件不支持短代码,但是,通过使用过滤widget_text器,我们可以在 WordPress 小部件中强制支持短代码。
我们可以在我们的对象构造函数中添加过滤器WPDribbble。
public function __construct(DribbbleAPI $dribbbleApiObject) : void
{
    // Set Plugin Path
    $this->pluginPath = dirname(__FILE__);

    // Set Plugin URL
    $this->pluginUrl = WP_PLUGIN_URL . '/wp-Dribbble';

    add_shortcode('Dribbble', array($this, 'shortcode'));

    // Add shortcode support for widgets
    add_filter('widget_text', 'do_shortcode');

    $this->dribbbleApiObject = $dribbbleApiObject;
}
5.设置模板标签
模板标签可以直接在 WordPress 主题中使用。模板标签的基本目的是创建我们WPDribbble类的新实例,并调用该getImages()方法。模板标签将是一个简单的 PHP 函数,它必须在插件类之外注册。它需要有一个唯一的名字;否则,它将与具有相似名称的函数/插件发生冲突。由于我们的插件名为WP-Dribbble,我们将模板标签称为wp_Dribbble().
function wp_Dribbble($user, $images = 3, $width = 50, $height = 50, $caption = true)
{
    $wpDribbble = new WPDribbble(new DribbbleAPI());
    echo $wpDribbble->getImages($user, $images, $width, $height, $caption);
}
最后
恭喜!您已经成功地使用 OOP 编写了一个 WordPress 插件。如果您有任何问题,请告诉我,我会尽力帮助您。
- 仍然感到困惑?
- 2. Dribbble API 类
- 设置类变量
- 方法getImages()_
- 添加类




![如何删除Word中的空白页[4种简单方法] 如何删除Word中的空白页[4种简单方法]](https://www.weixiaolive.com/en/zb_users/upload/2023/07/20230702124855168827333590644.png)

















发表评论